


As the summer weather rolls in, I’ve been wearing plenty of dresses. And with those dresses, I’ve discovered the need for some accessorizing, so for this weeks MakeKind post, I’m showing you how to make a super versatile belt for summer and beyond! Here’s how!:
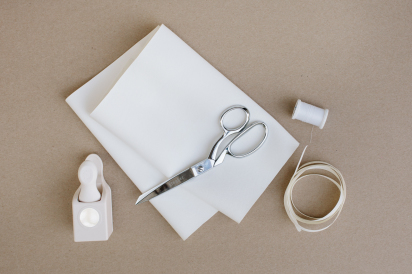
MATERIALS // 1/8 yard of synthetic leather, 1″ circle punch, scissors, thread, 1 yard of 1/4″ grosgrain ribbon, sewing machine (not shown)
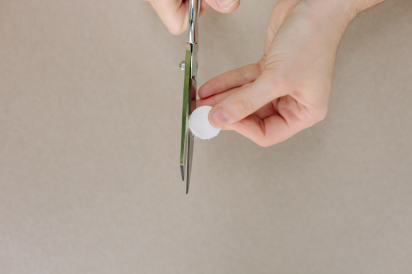
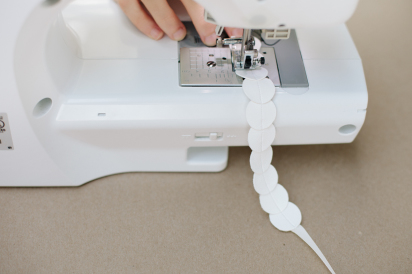
STEPS // 01 MAKE CIRCLES Using the circle punch tool, punch out about 40 circles. Some of the circles might not come out perfectly, because the fabric might get caught occasionally. If that happens, just use your scissors to clean up the circles.

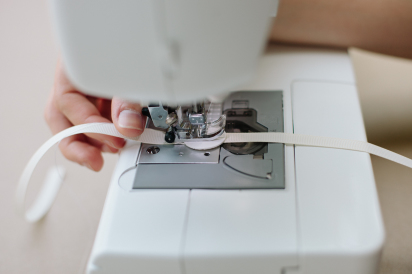
02 // START SEWING Measure about 10″ of the ribbon and mark it with a pencil. From that mark line up one circle directly in the middle of the ribbon and sew until you’ve stitched about 2/3 across the circle. You can sew a shorter length, but whatever length you choose, just make sure to be consistent as you continue adding and sewing the rest of the circles. When you are ready to add your next circle, stop sewing with the needle in the down position. Lift the foot and place the next circle in line and replace the foot to the down position to hold it in place and resume sewing.
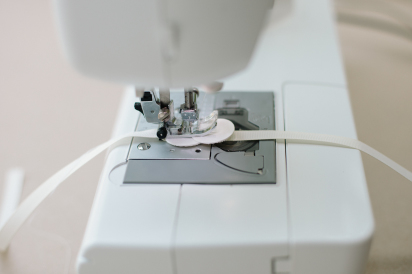
03 // KEEP SEWING Using as many circles as you want, continue sewing and adding circles, making sure to leave about 10″ of ribbon on the other end to tie with.
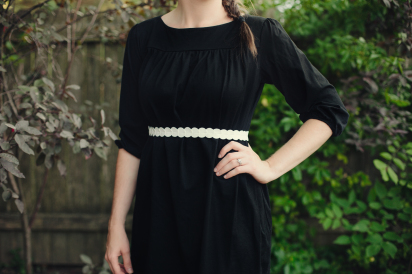
Once finished, tie the ends in a bow and enjoy!
Gah! This is ADORABLE! And looks like something I could *actually* make!!
Thanks Laura and Erin!
What a great idea and so very pretty! I’m putting this on my list of things I want to make! :)
What a great idea and so very pretty! I’m putting this on my list of things I want to make! :)
trop joli !!
Beautiful! Deffinately going to try this
This is a beautiful belt! I am going to have an attempt at this with felted wool circles! Thank-you for the inspiration.
I want that dress/tunic. Where – do you remember?? Please please?
~k
Korin, I’m sorry I’m just now seeing your comment! If you happen upon here again the dress is from Uniqlo years ago. so sorry!