
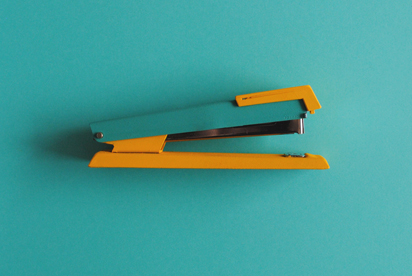

Happy midweek, friends! I’m moving into a new workspace later this fall (YAY!) and itching to find some jazzy office accessories. Nothing over-the-top, just a few fun pieces to give it some life. This week I decided to start small and bright, revamping a trusty old stapler. Say hello, to my newest (colorblocked) desk accessory!
MATERIALS // metal stapler, pliers, painter’s tape, drop cloth, spray paint (I used 2 colors)

STEPS // 01 DISASSEMBLE STAPLER I found it easiest to disassemble stapler prior to painting. To do so, use pliers and remove pin from back of stapler. Separate stapler and set aside parts. Tip: If your stapler doesn’t come apart, don’t sweat it! Simply tape off each section for painting.

02 // PREP FOR PAINTING Next, tape off any areas of the stapler you do not wish to adhere paint. I opted to paint only the base and handle and to leave the shiny metal parts as is.

03 // PAINT STAPLER In well-ventilated area, place stapler parts on drop cloth. Wipe down with damp rag. Using slow side-to-side movements, apply two thin coats of spray paint (refer to paint can instructions for drying time between coats).

Let dry overnight. Tip: Once paint is dry, apply clear coat to help protect against wear and tear.

04 // ASSEMBLE STAPLER Once dry, assemble and begin organizing!


Stay tuned for more workspace inspired projects!
[photos by Christine for Design For Mankind]
What a great stapler! I love the colors you chose.
NIce! Question, where did you find the paint?
After my folding chair project I wanted to test out another spray paint, so I picked up this Detroit made eco-friendly paint (http://www.dickblick.com/products/plutonium-spray-paint). It’s a a modified automotive acrylic & was a breeze to use!