

With the weather allowing more dinners al fresco, I have found the need for candlelight as the sun goes down and the meal time lingers. These candle holders I’ve created are simple and offer a world of possibilities! Follow along for the instructions!:
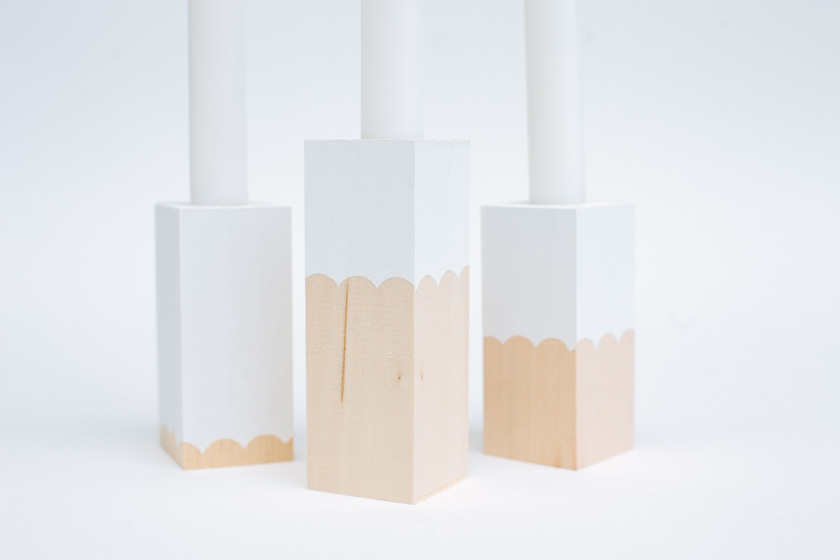
MATERIALS // Whittling block, white craft paint, paint brush, dot stickers and a 7/8″ drill bit (or one that matches the size of candles you choose to use)

STEPS // 01 DRILL HOLE Mark the center of one end of the whittling block. Using the drill bit, make a hole in the wood, about 1″ deep.


02 // MASK With the dot stickers, create a pattern where you want the wood to remain showing. I chose to go around the whittling block, overlapping the circles slightly. Press the stickers firmly once in place.


03 // PAINT Going over the dots, paint the whittling block. I chose to paint only one end of the whittling block and left the bottom bare. To ensure full coverage, paint 2-3 coats and allow to dry completely.

04 // PEEL Once the paint is dry, gently peel off the stickers to reveal your design.

Then get your candles ready and light them up!

So cute and such a great idea!
Oh I love the make kind posts – totally cool! This is an ace project! But how great did the stickers look?
A such a lovely idea!
Hi, thanks for sharing this tutorial. I’m going to try to make this for a bridal shower.
Just wondering, when you light up the candle, will the wax drip to the sides of the holder? Thanks :)